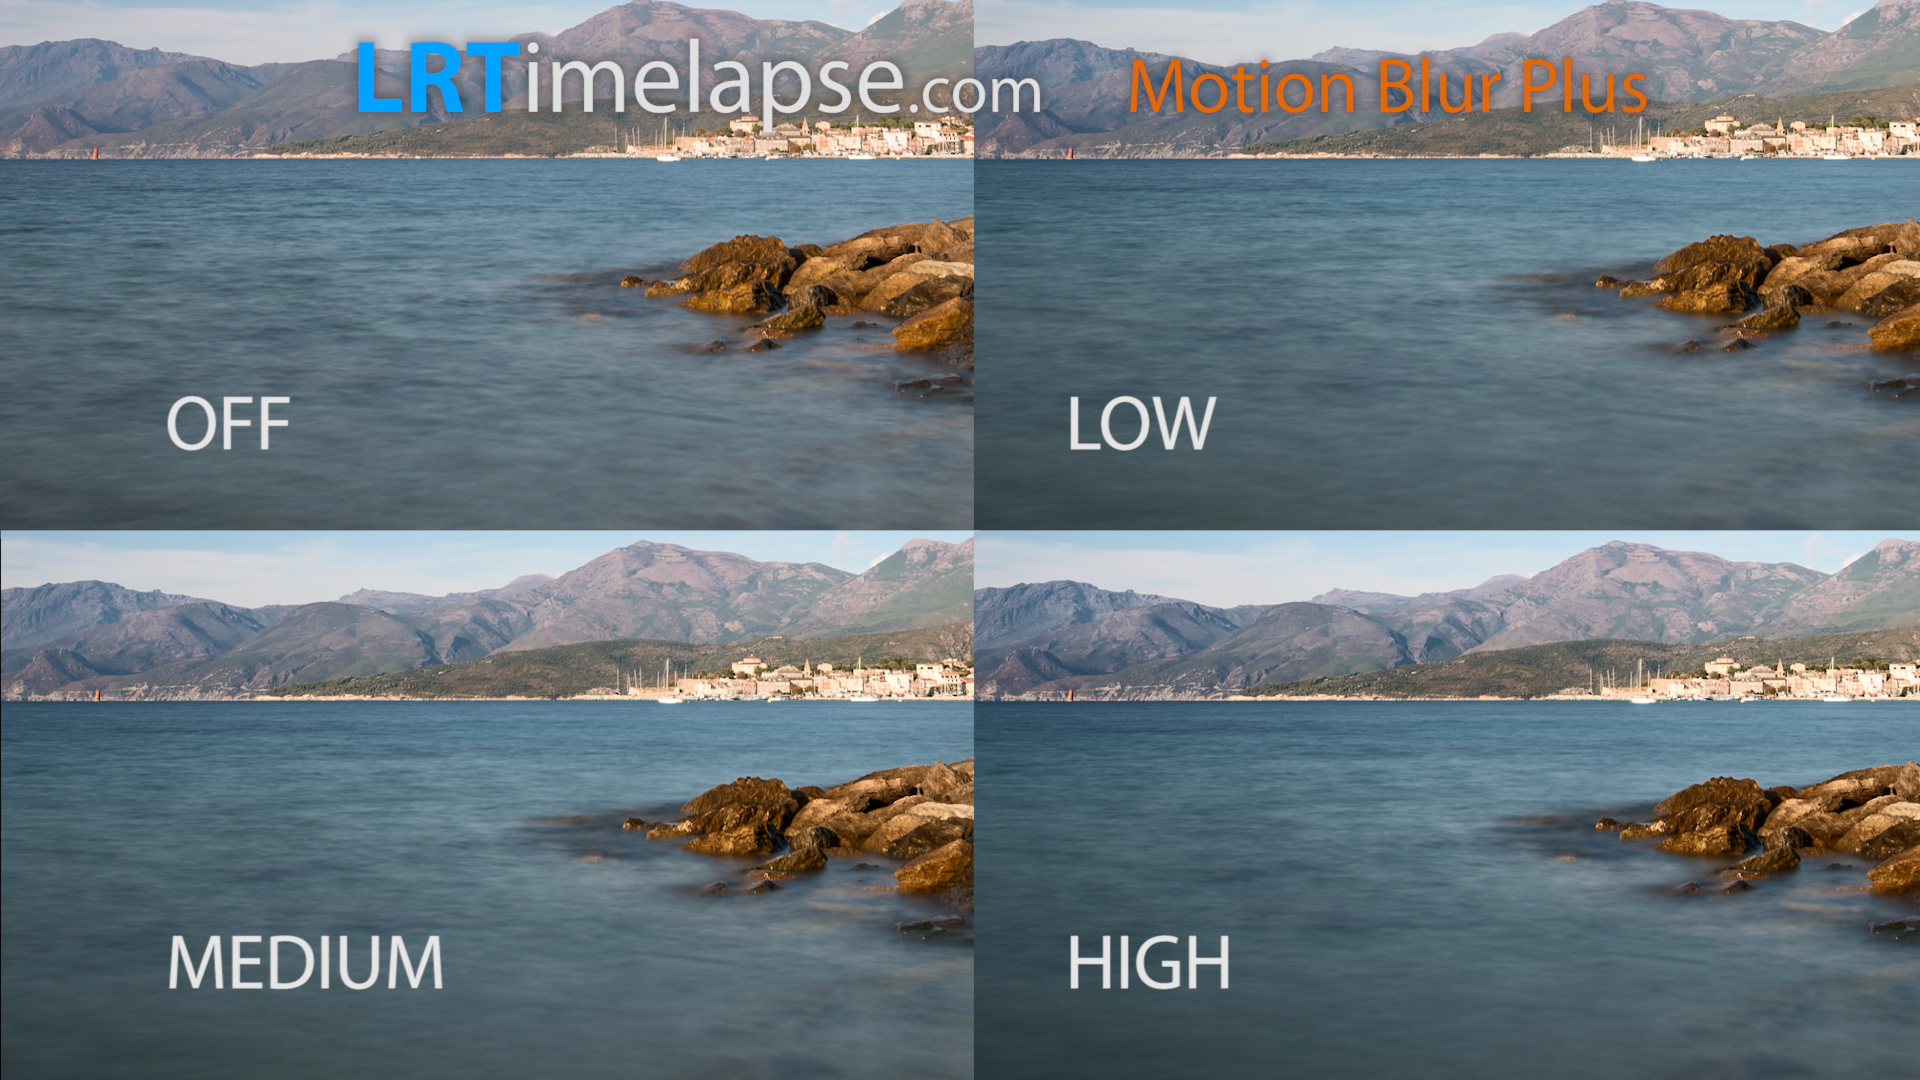
I get asked a lot about the LRT Motion Blur Plus effect and how the different levels perform, so I’ve made this video to show you.
LRT Motion Blur Plus is a technique that will smooth your sequences keeping their natural look and without taking away details. This will of course not substitute working with an ND filter and using the Holy Grail Wizard and Visual Deflicker techniques – but LRTimelapse Motion Blur Plus will significantly add to quality of the output at the very end of the processing chain.
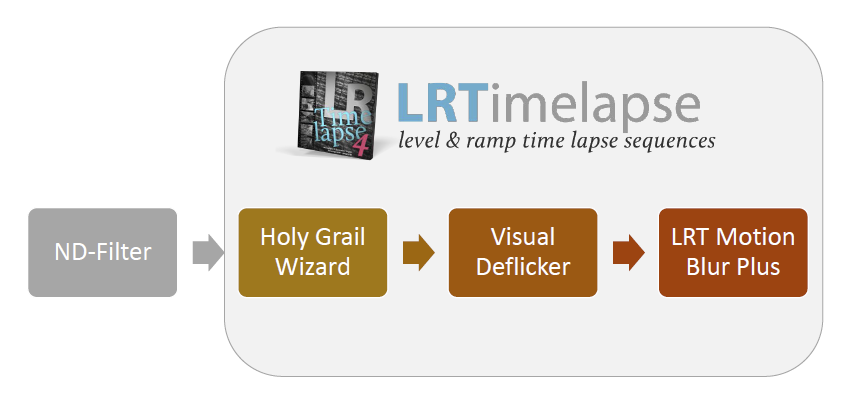
An ideal chain of Processing: Shoot with an ND-Filter whenever possible, apply the Holy Grail Wizard (on sequences shot with the HG-technique), use the Visual Deflicker, apply LRT Motion Blur Plus when rendering.
BTW: All sequences in the video (except the Milky Way) have been shot with an ND-Filter and the other techniques had been applied as well!
Please note that LRT Motion Blur Plus level “Low” requires a licensed LRTimelapse and is not be enabled in the free trial version. For the Medium and High settings, you need a LRTimelapse Pro license. So this video might help you too, if you have to decide, whether to buy a Private or Pro license. But of course the higher Motion Blur Plus availability and levels are not the only benefits of a licensed LRTimelapse. You’ll find all differences between license types here.
So – check out my video comparison. Please note, that due to the heavy video compression on the 4 in 1 scenes the sequences with MBP suffer in quality because of the high bandwidth needs of the edit without.
You can download the video in full resolution and better quality for your private watching from here. Please note that the material is copyrighted and must not be used for other purposes.
I’ve created the LRTimelapse Motion Blur Plus filter in the first instance, because I personally needed it for my work. I can’t think about one single sequence, that I’ve exported without using it since I developed it. Before LRT MBP, I spend a lot of time in After Effects trying to apply similar effects, but they never came out so well, and additionally the have been always very time consuming to apply. That’s why I decided to implement my own filter. Now, I just leave MBP on and the results look great. Please note that the hightest setting is not necessarily the best. Mostly I work with the “medium” setting.
LRTimelapse Motion Blur Plus gives you the following benefits:
Smoother sequences
Less Noise
Less artifacts
Subtile contrast enhancements
Better bandwidth usage
Better quality on platforms like Youtube/Vimeo
Check out the difference in sizes of the MP4 files. The higher the Motion Blur Plus setting, the smaller the files, this means more bandwith for visual important image information and thus a much better quality, especially if you have bandwith restrictions like when uploading to Youtube or Vimeo!
This might also be of interest to you:
Internal Workflow In LRTimelapse 6 you can do a simple, all internal workflow. This is not meant to replace the Workflow with Lightroom, it should rather…
LRTimelapse 6.3 Update released! Hey guys, after quite some beta testing, I've now released LRTimelapse 6.3. It's a release with a few new features, but mostly many improvements…
LRTimelapse 6.2.1 ready for download! LRTimelapse 6.2.1 brings an improved timestamp overlay feature, a dark titlebar on Mac and fixes some important issues. New features Added a checkbox to…