This explains the fully featured export from Lightroom.
- In Lightroom, make sure that the Filter LRT Full Sequence is selected
- Right click on the first image and choose Go to folder in Library.
- Select all images
- Read Metadata from files to get all changes from LRTimelapse into Lightroom
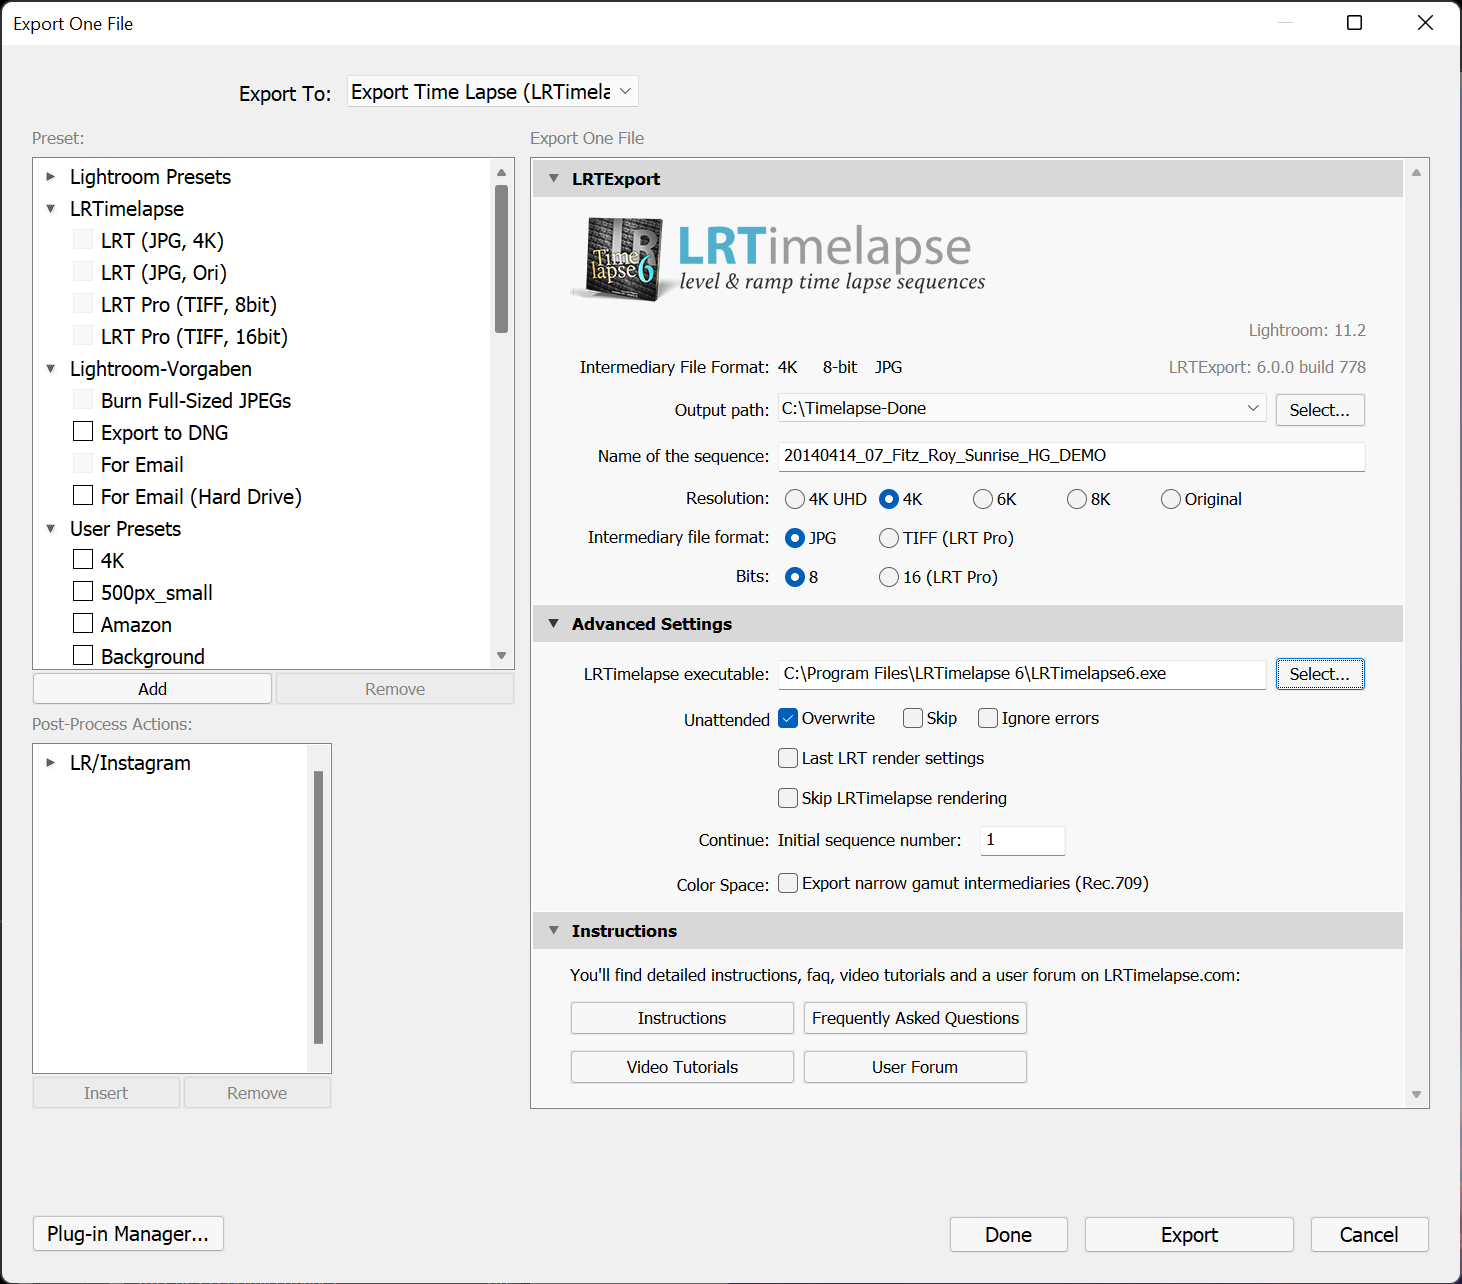
- Select Export and choose LRTimelapse / LRT (JPG 4k) or one of the other presets.
(don’t worry, this won’t necessarily render in 4K but just create the intermediary files in 4K.)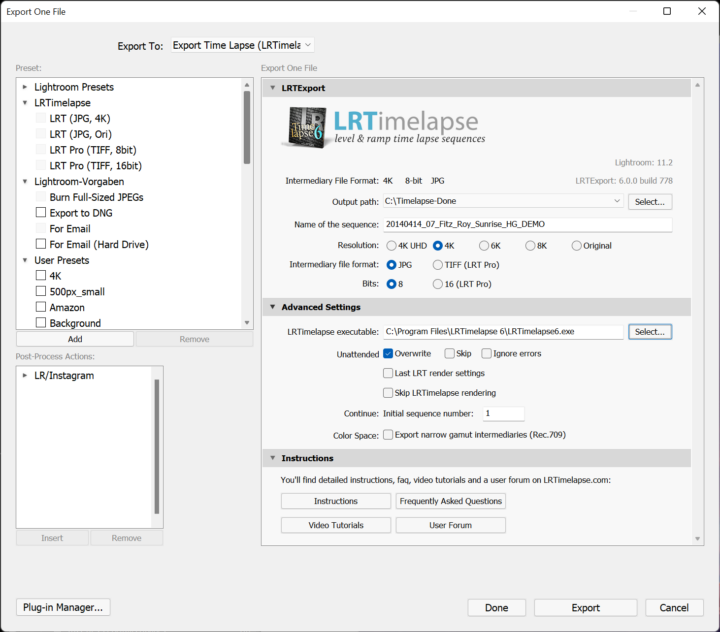
- Make sure, that the path to the LRTimelapse executable is set correctly (especially if you had an older LRTimelapse version installed before)
- Set an output path, where your time lapse intermediary sequences and rendered videos generally should go to – there is no need to define the name for each sequence on export, since LRTExport will create the folder name from the original sequence name automatically.
- You can leave the other settings at their defaults.
- Click on Export and wait until the exporter has finished.
- Now LRTimelapse should come up and present its render dialog:
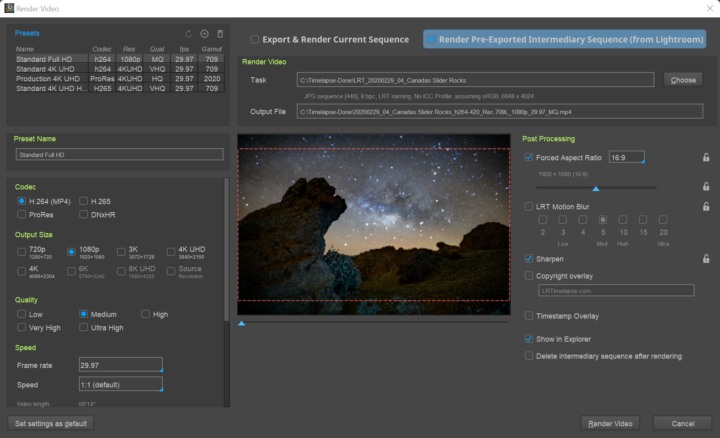
Click on “Standard Full HD” under Presets at the top left. - You can check “Forced Aspect Ratio” on the right and set the aspect ratio to 16:9 to generate a Video in the default Aspect Ratio of 16:9. With the slider below you can move the crop up and down.
- Advanced tip: if you mostly render with the same settings, you can turn on “Last render settings” in the LRTExport dialog to have the video rendered directly with the previous settings you set in LRTimelapse for rendering, without having you to confirm the render dialog.
- Click on Render Video
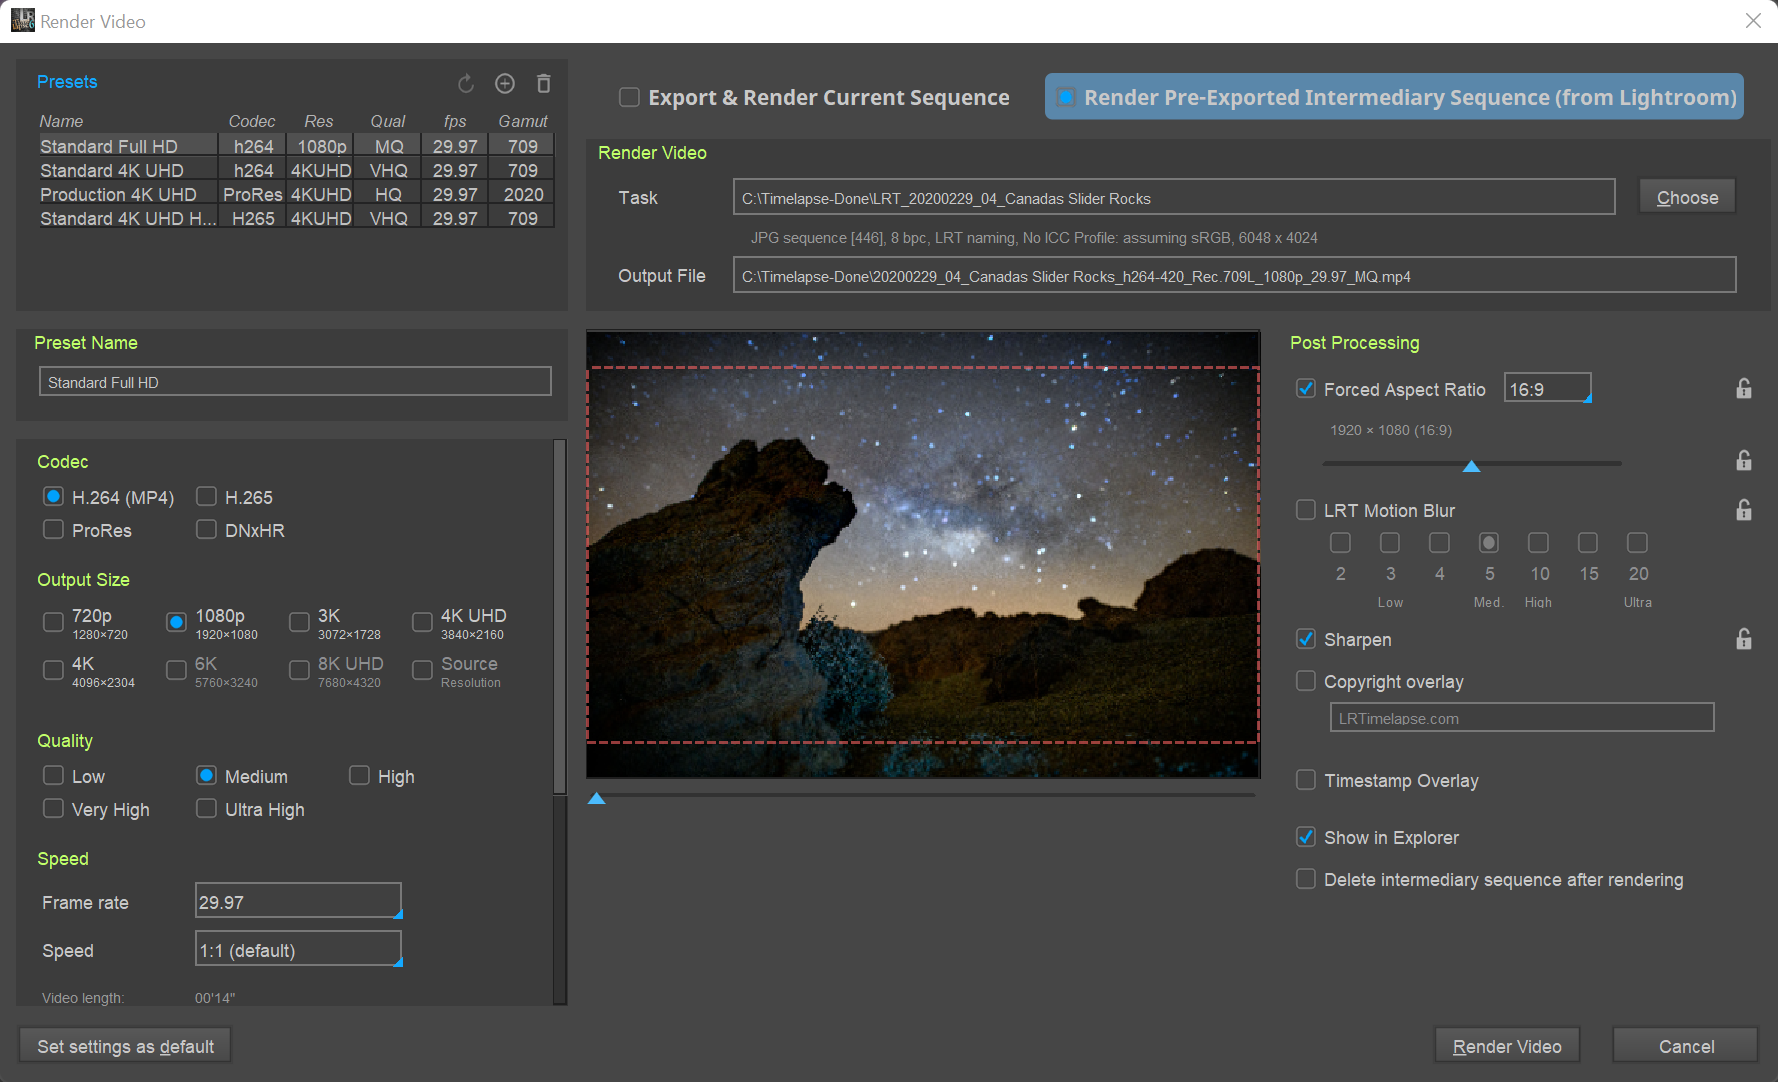
That’s it! After short time you should find your rendered video inside the output folder you defined in LRTExport.