In LRTimelapse 6 you can do a simple, all internal workflow. This is not meant to replace the Workflow with Lightroom, it should rather be understood as an additional option which might provide shortcuts in some situations.
Here you’ll learn how to do a simple timelapse editing by using LRTimelapse only. Feel free to combine this with the fully featured Visual Workflow.
You will perform the internal workflow on the Visual Workflow tab.
If you need to use JPG/TIFF/PNG sequences, you need to convert them to DNG with Lightroom first.

- Load your Sequence by choosing a folder on the left. Wait until the sequence has been loaded.
- Launch the Keyframes Wizard, it will automatically create some keyframes based on an automatic analysis of the luminance progression. By dragging the slider you can easily create more or less keyframes. Keyframes will mark the images, that you are going to edit manually – the develop-settings for all other images will be calculated automatically by LRTimelapse.
Note: for Sequences shot with the Holy Grail approach, the wizard will create two orange triangular keyframes for each change in ISO, Shutter-Speed or Aperture. Those are for internal use only. - Sequences shot with the “Holy Grail” approach:
- The Holy Grail Wizard button will be enabled, just click it and an orange curve will get calculated to compensate the Holy Grail camera adjustments.
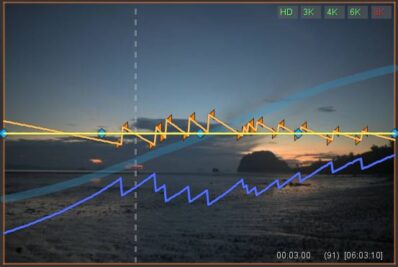
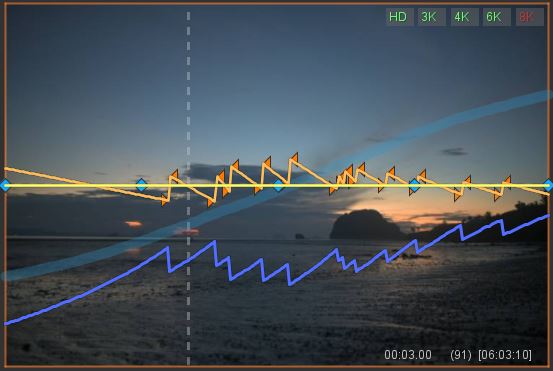
The orange curve shows the compensations that the Holy Grail Wizard calculated for the camera adjustments.
- Use the Rotate/Stretch sliders to rotate the orange curve in order to get it as close to the horizontal middle line as possible. If you want, for a sunset you can let it fall a bit and for a sunrise you can let it raise a bit. The thick cyan curve gives you an idea about the natural luminance transition. This is also explained in the Holy Grail Tutorial.
- The Holy Grail Wizard button will be enabled, just click it and an orange curve will get calculated to compensate the Holy Grail camera adjustments.
- Save
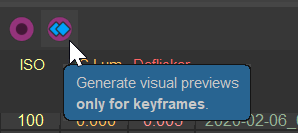
- The double diamond icon indicates, that visual preview will be generated for the keyframes only.
You can now start editing the first keyframe via the editor on the right.
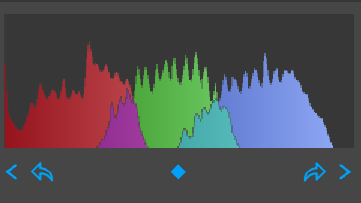
After each edit you need to wait a moment for the visual preview to get recreated. - When you finished editing, click on the double icon to the right (below the histogram), this will synchronize your edits to the next keyframe.

The single (outer) arrows below the histogram allow you to jump from one keyframe to the next. The double (inner) arrows will synchronize the edit to the next / previous keyframe.
- On the next Keyframe now make your changes in editing, if needed.
- Edit all keyframes like this. After each one, click on the double arrow to bring the edits to the next Keyframe.
- Auto-Transition calculates the transitions for all images in between the Keyframes. It will give you a short glimpse on all curves calculated in the preview, you might permanently turn on the display of all curves by clicking on “ALL” on the top right of the preview.
- The Visual Previews will now switch to “All Frames” mode and start developing the previews for the whole sequence.

- After all previews have been developed, apply a single or multipass visual deflicker as explained in the instructions for the Visual Workflow.
- You can now either go to Lightroom and export from there with all options as explained in the Export and Render Instructions – or – you can render internally as follows.
- Click on Export and Render (internal). This will first ask you for an output path. Choose a parent folder here, where your finished timelapse video and the intermediary sequence should go, like “Somewhere/Timelapse Done“.
After that the Render Dialog will come up in mode Export and Render Current Sequence.

- Set your render settings (you can use one of the presets at the top left) and then click on Export & Render. This will create a background process in the LRTimelapse Main Windows and do the export and rendering.

Please note: in comparison to the Lightroom Export, the internal export will always create 8 bit sRGB intermediary JPG files and indicate that with a warning. The quality will be inferior to the quality provided by the Lightroom Export via the LRTExport plugin.