These instructions cover the basic aspects of the LRTimelapse workflows.
Please make sure to check out my video tutorials too!
LRTImport
You can use the LRTimelapse Importer to import your timelapse sequences from your memory card to your harddisk, this has a couple of advantage in comparison to using Lightroom or the Filemanager to do copy the files … Continue reading
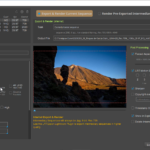
Visual Workflow
This is the “Swiss Army Knife” in LRTimelapse. It works for any RAW sequence, holy Grail or not. This is the workflow that you will be using, if you shoot RAW (you should). Holy Grail sequences will automatically be detected … Continue reading
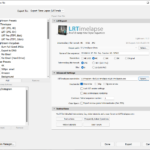
Internal Workflow
In LRTimelapse 6 you can do a simple, all internal workflow. This is not meant to replace the Workflow with Lightroom, it should rather be understood as an additional option which might provide shortcuts in some situations … Continue reading
Export and Render via Lightroom
This explains the fully featured export from Lightroom to the intermediary sequences and the Rendering in LRTimelapse. … Continue reading
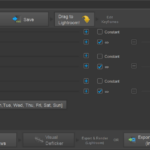
Long Term / Construction
There are special filters in LRTimelapse to process long term / construction time lapses with lots of changes in brightness, contrast and white balance. Sophisticated filters for Luminance, Contrast and Hue allows to filter by all of these criteria … Continue reading
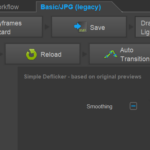
Basic/JPG (legacy) Workflow
The old Basic Workflow from LRT3. You can use it for simple sequences or sequences shot in JPG. A better choice would be converting JPG sequences to DNG with Lightroom and then using the Visual Workflow too on those DNG-sequences. … Continue reading
ACR / Bridge / After Effects
Basic workflow with Adobe Camera RAW / Bridge Since Lightroom is basically just a front end with an integrated Adobe Camera RAW Library, you can use LRTimelapse with Adobe Camera RAW as well. … Continue reading