There are special filters in LRTimelapse to process long term / construction time lapses with lots of changes in brightness, contrast and white balance. Sophisticated filters for Luminance, Contrast and Hue allows to filter by all of these criteria to get a sequence that looks as smooth as possible.
Here is a video where I show how to do the filtering. In LRTimelapse 6 the filters moved to the Visual Workflow on the right side.

The biggest challenge when shooting time lapses over weeks and months is, that you will have to deal with very inconsistent lighting situations. Due to rather long intervals and the days passing by very quickly in the final time lapse, you’ll get rather unpleasant results if you don’t find a smart way to filter that sequence.
The approach, that LRTimelapse uses, is, in the first instance, to apply intelligent filters to those sequences with several thousands of images and leave only those that have a rather consistent look. After this, additional Deflicker and Motion Blur Plus can be applied to refine the sequence. The result is a rather smooth sequence that makes the viewer focus on the subject without being too much distracted from the changes in illumination and lighting.
And this is how it works.
- Load your sequence

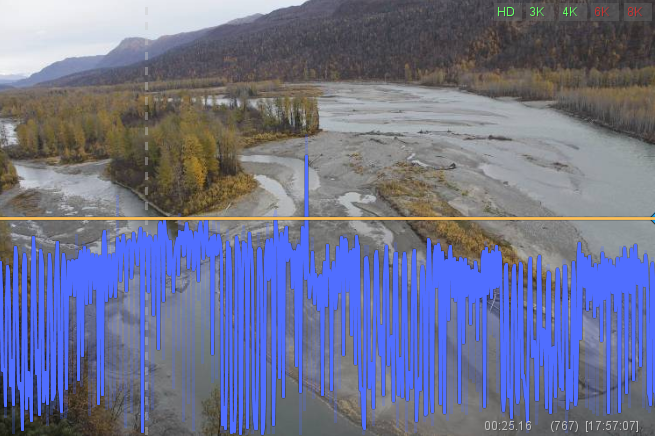
Lots of changes in brightness due to long intervals and the sequence spanning several months
You’ll get a more or less bumpy blue luminance curve due to the long intervals and changes in lighting.
- Switch to the Long Term Workflow
- Click on Filter
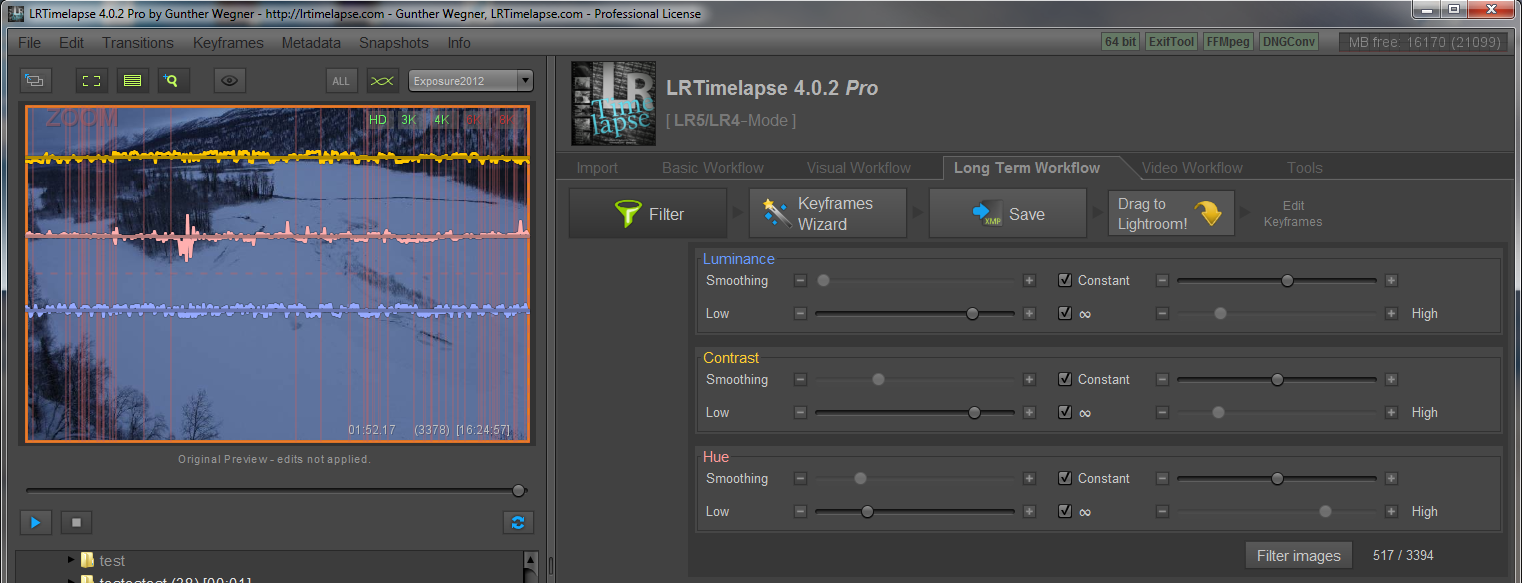
You’ll get two more curves: one for the contrast of the images and one for the toning (hue).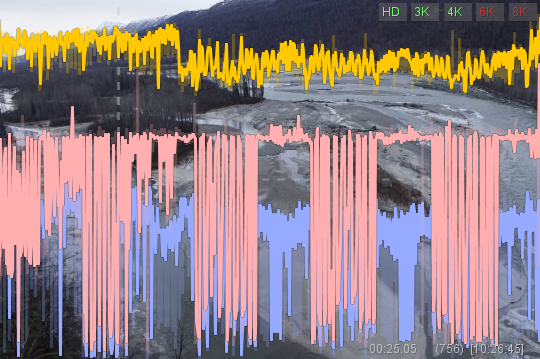
The additional curves for contrast (orange) and hue (pink) are as well very volatile before filtering.
- Choose your filter settings. The low and high sliders are mirrored – if you drag the left slider of contrast for example to the right the right slider will come to the left. You can imagine this as narrowing the bandwidth for that parameter (in this example contrast). The closer the two sliders come to each other the narrower the bandwidth, the closer the values to the ideal line that will be kept – you’ll see that in the curves on the left. The darker curve is the ideal line that you set via the smoothing slider – the brighter curve is the actual line of the residual images.
- Decide, if you would like the reference curves to follow the trend or be constant. For very long time lapses I’d recommend clicking on “constant” on each of the filters, but you might just set the trend with the smoothing sliders too.
- Now start filtering by dragging the “low” sliders to the right, using the +/- buttons might help, if you have large sequences and filtering takes longer. You can add Shift or Ctrl to the buttons, to make larger steps. Best use the sliders from top to bottom.
- You can play the filtered preview at any time, only the residual images will be played. You can change your filter settings, until you are satisfied.
- Observe the curves while filtering, try to get rid of the extreme values. Check the number of residual images at the bottom right as well.
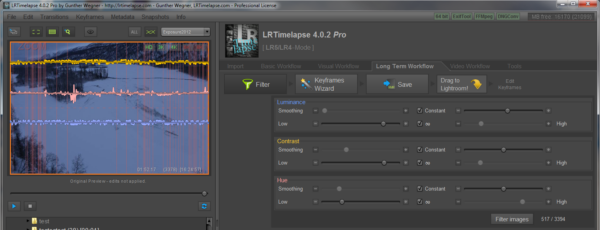
After filtering, the residual curves have a much lower bandwidth. The sequence is ready now for final editing and deflickering.
- Click on Filter Images, this will move the filtered images to another folder with suffix “_REMOVED” after a confirmation dialog. This allows you to start over at any time, just by moving the removed images back to the original folder later.
- Click on “Filter” to close the filter panel. Now you have a folder with residual images that you can now edit exactly as explained in the Visual Workflow description. You can add keyframes, make transitions, create visual previews and apply the visual deflicker. At the end I recommend rendering with Motion Blur Plus.
Additional explanations:
- “Constant” will make the reference curve not follow a trend but be horizontal and straight. For very long time lapses you might prefer to have a rather constant reference for the values in that case, click on “constant”.
- Checking constant will reveal another slider on the right, with which you can shift the constant reference up and down.
- The “infinity” symbol just links the low and high slider. If you untick it, you can individually choose the low and high cutoff levels. Normally I’d leave the sliders linked.
Rendering is explained in the Export and Render Instructions.